How to revive a thrifted chair on a budget
Have you ever been out thrifting and found a chair with good bones but needed a little bit of work so you passed it up? Not sure if you could redo the chair on your own. I am sharing how to revive a thrifted chair on a budget.

I love decorating my home with a mix of high end and budget friendly decor because I have a tight budget.
That is one of the reasons I love thrifting.
There are some amazing pieces out there, you just have to be patient and diligent in your search.
In searching one day I found this amazing chair that needed a little tlc for $25.00.
Restoration of a fabric chair is not something I have tried, but was eager to give it a go.
This chair had been sitting for several months and decided it was finally time to tackle the restoration.
Here is what the chair looked like when I picked it up.
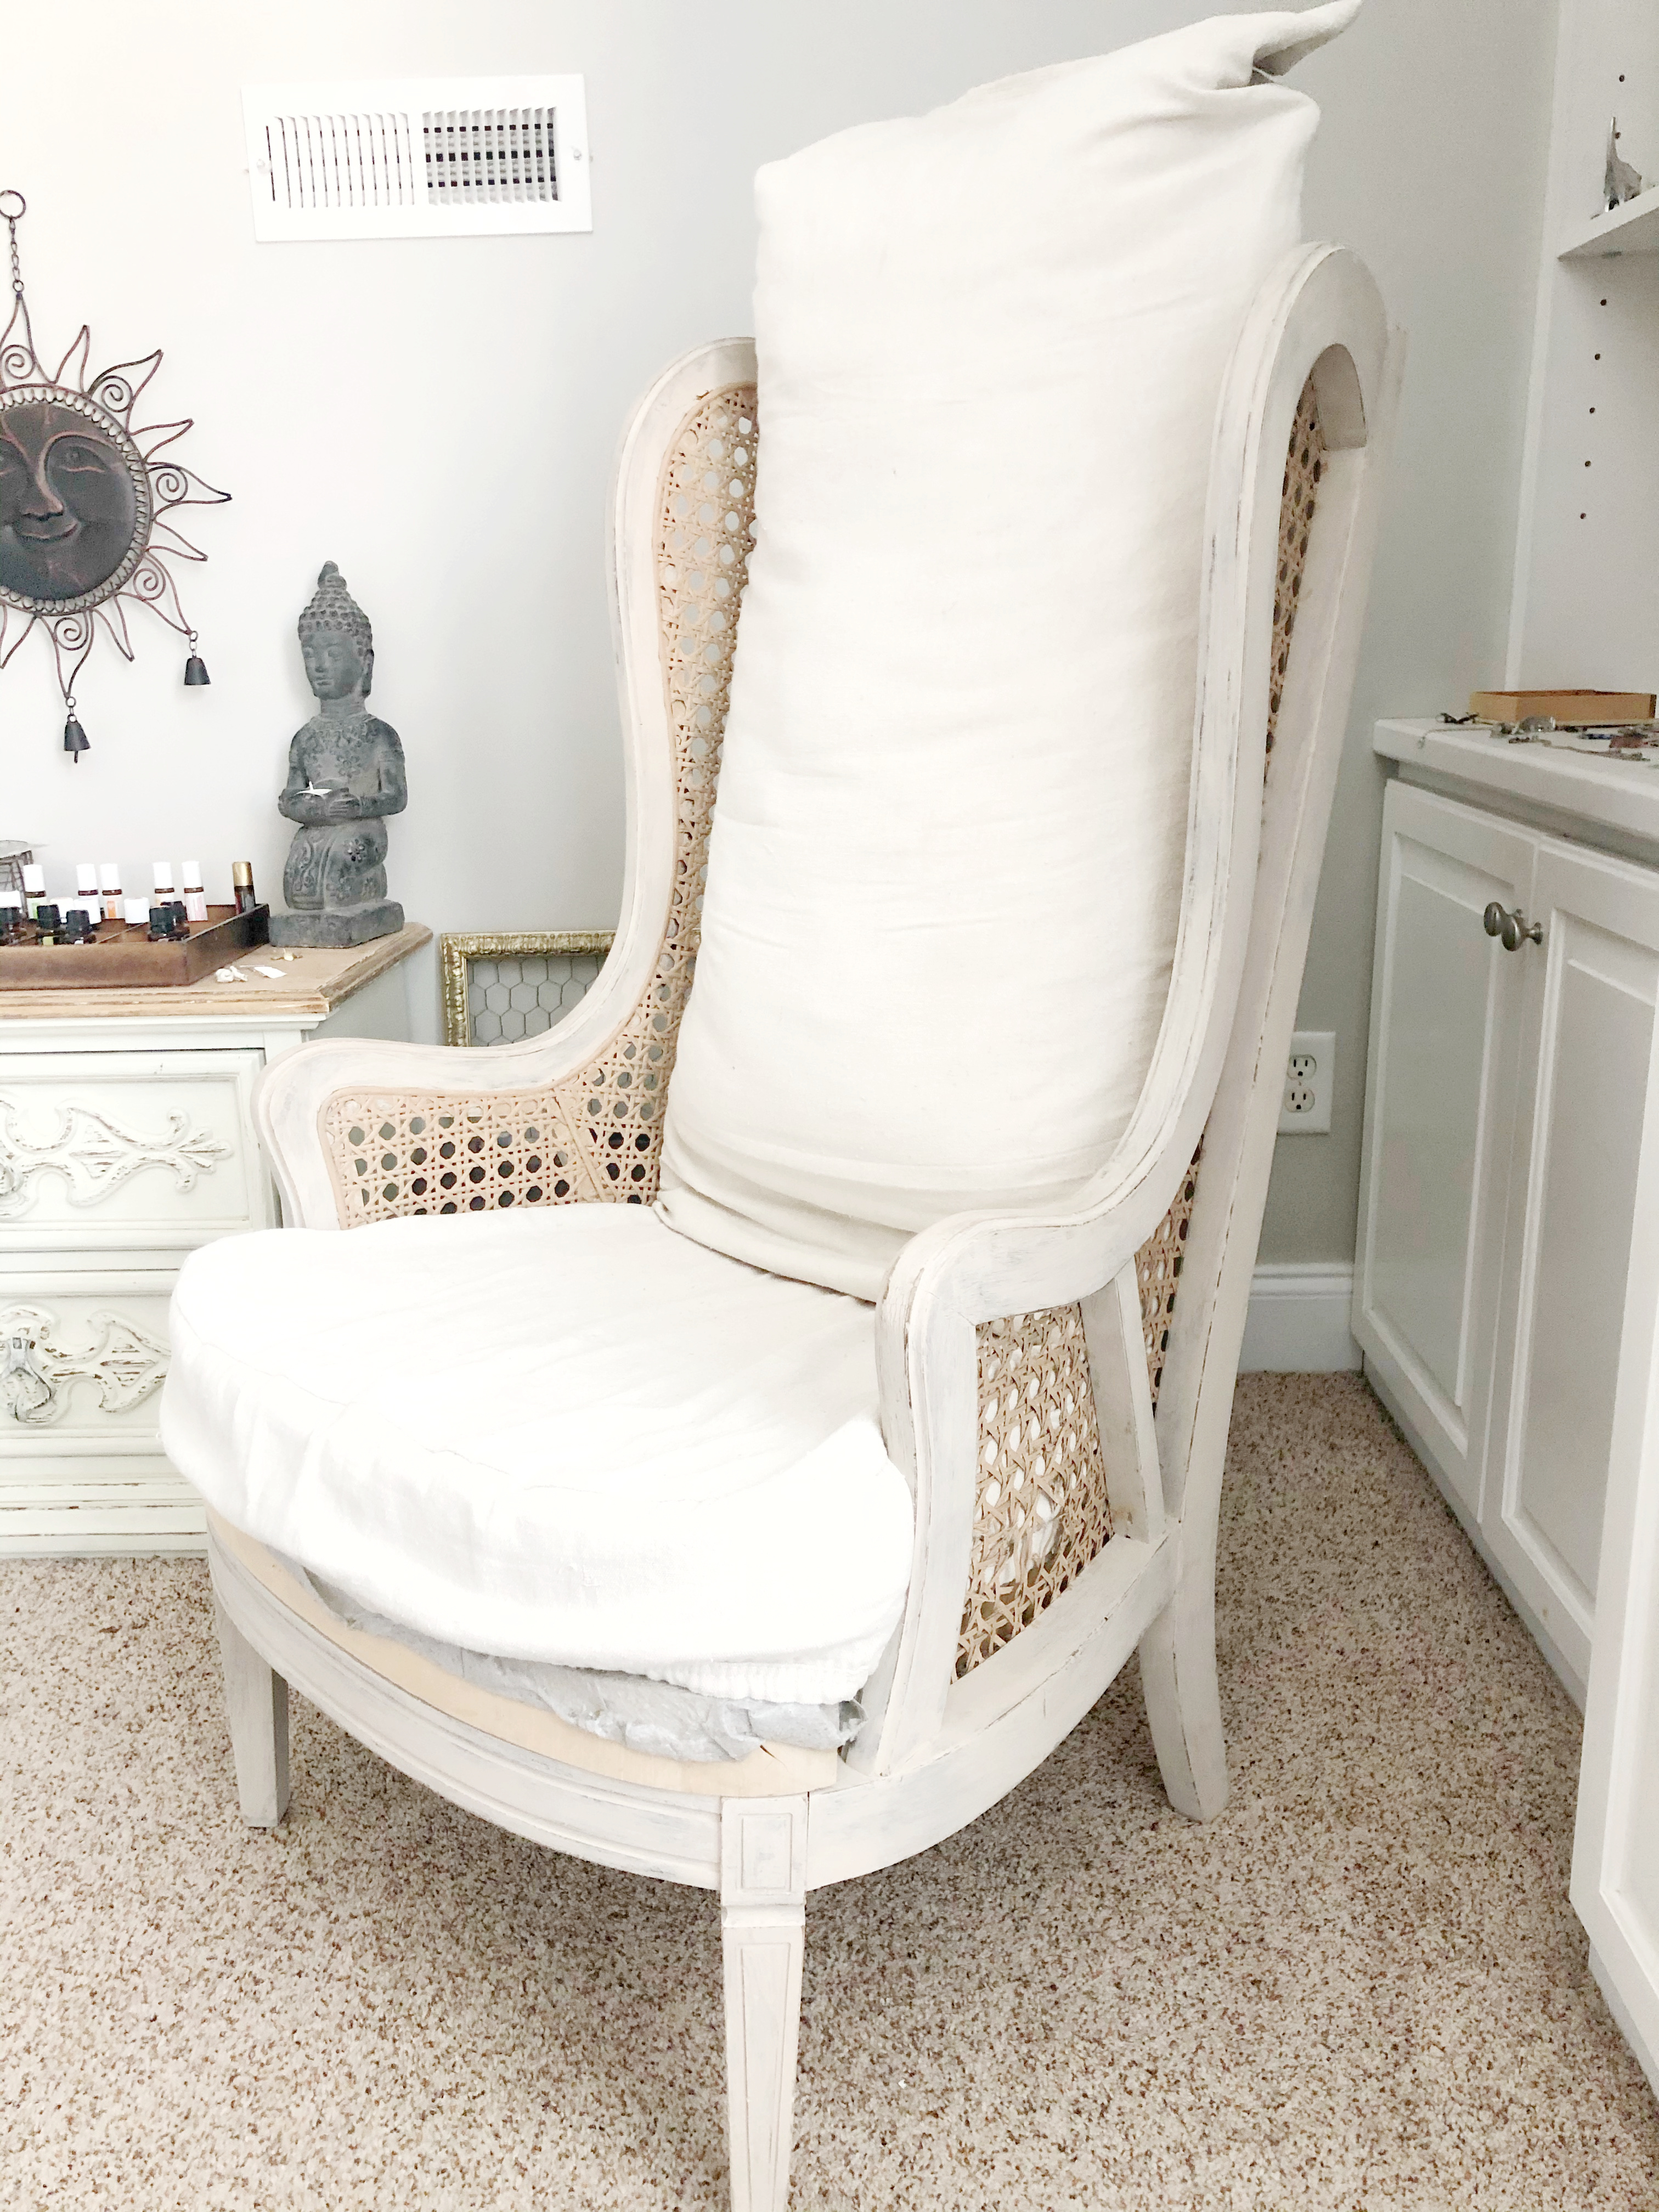
When I first brought the chair home I thought it would not need painting until I pulled out the fabric I was considering.
Up against the fabric the chair had a pink cast to it.
Once I figured that out it was time to get started.
Steps to chair restoration
Before any restoration of the thrifted chair could happen it had to be cleaned.
After removing the fabric I was able to clean it really well.
Then painted it with two coats of Fusion Mineral paint in Raw Silk.
Once the base of the chair was painted it was time to deconstruct the back.
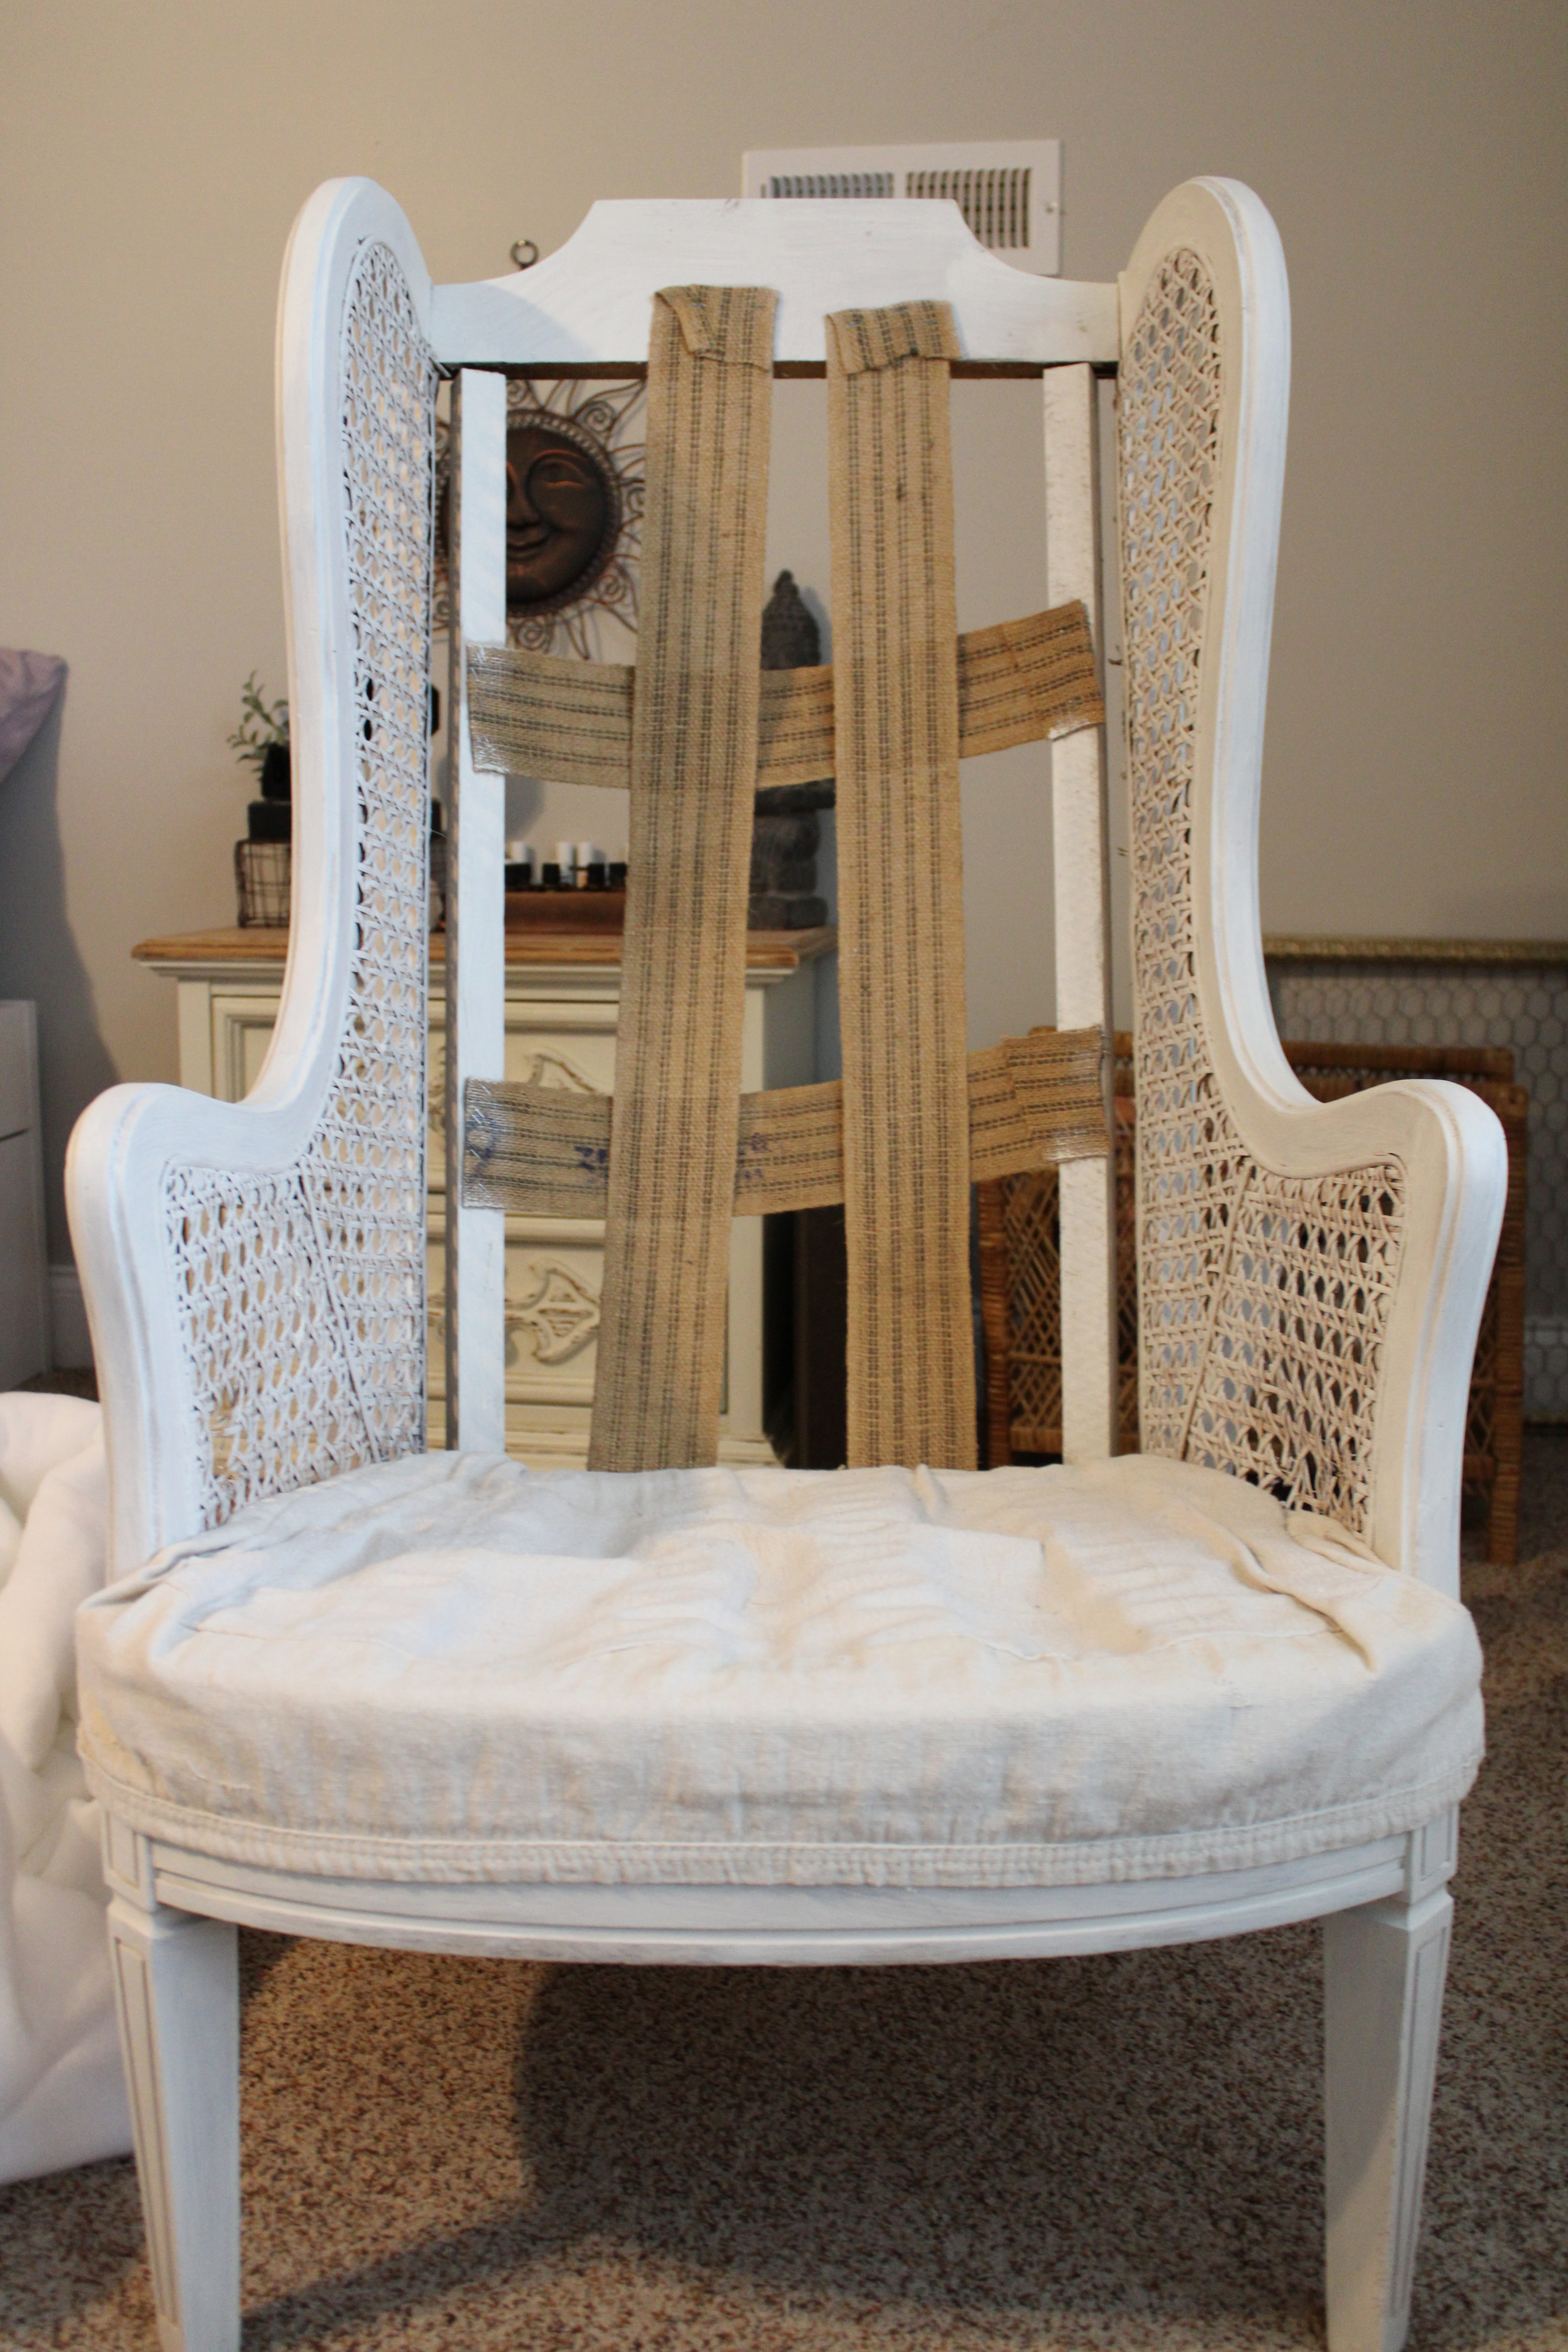
Deconstruction of the thrifted chair
When I removed the drop cloth fabric from the seat and back of the chair I discovered they had used a bed pillow for the back.
Yuck! That was thrown out immediately.
You can see in the picture above I reused a small section of the drop cloth to cover the springs of the chair.
I discovered two small holes in the caining but chose to not to do anything about it at this time.
As you can tell the back chair webbing was not in good shape and needed to be replaced.
Once the chair was painted I was able to remove the jute webbing the previous owner had attached.
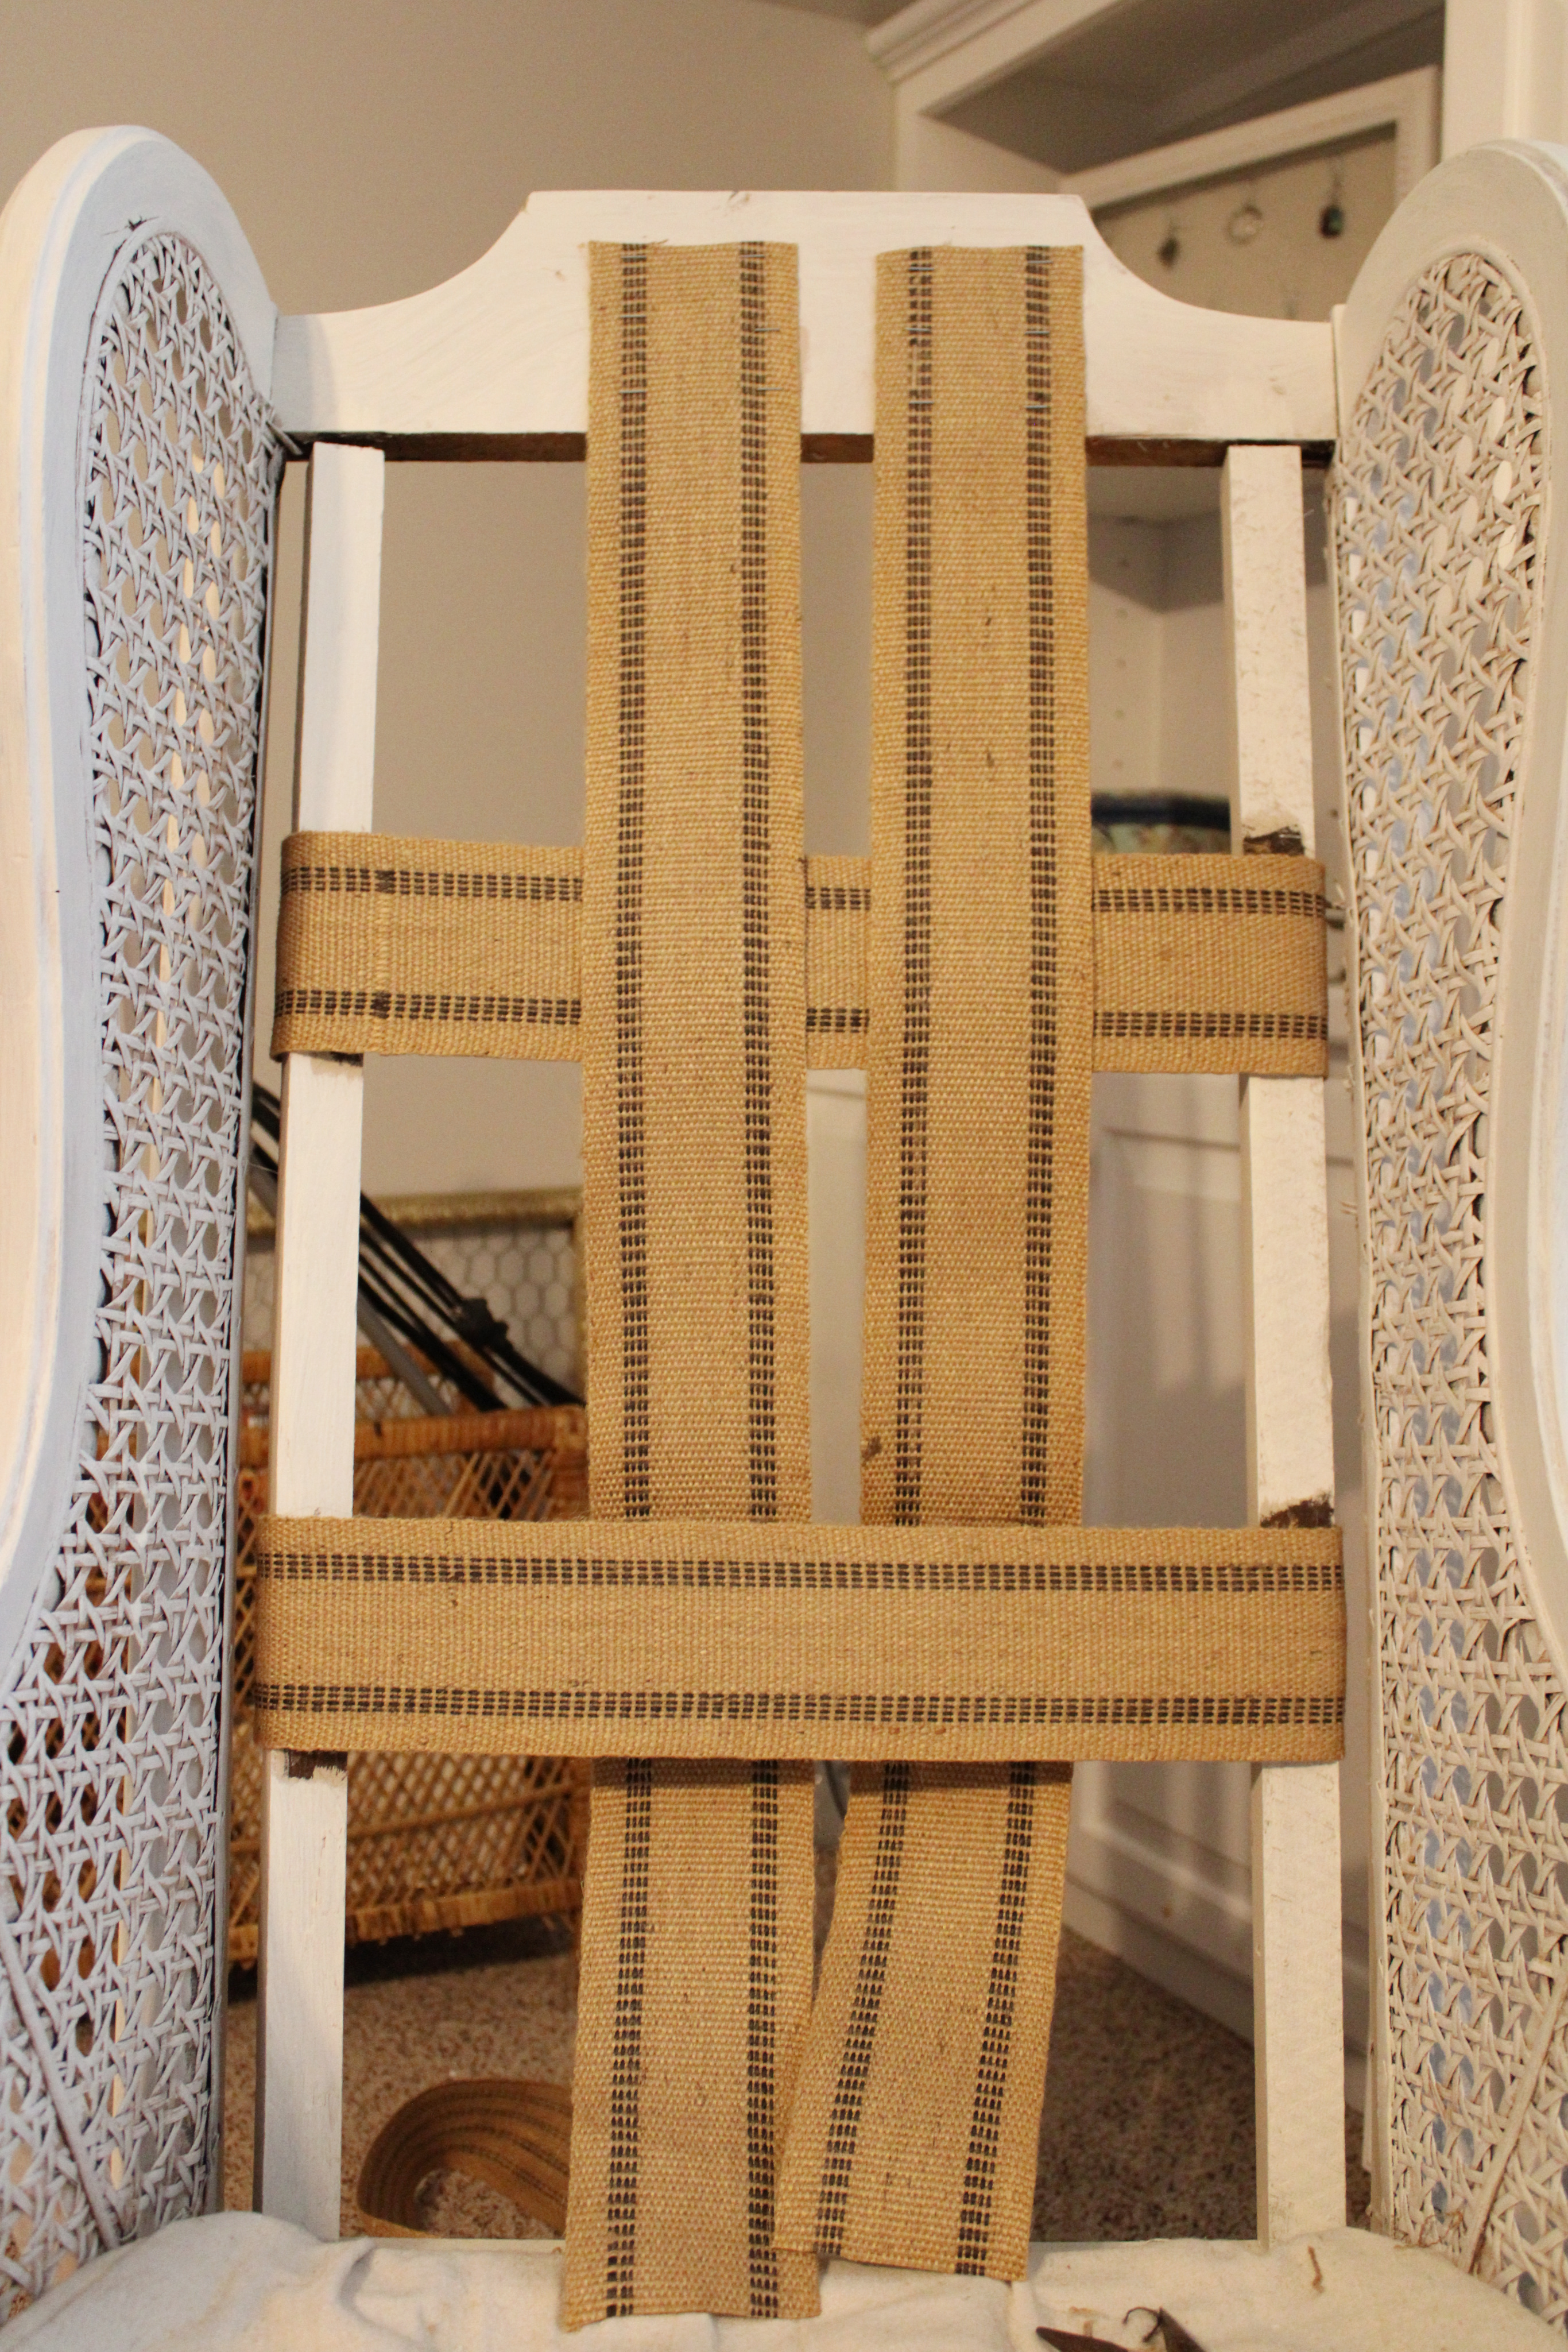
I was able to replace it with some wider jute webbing I had purchased many months before.
Attaching the jute webbing
Attaching the jute webbing was not difficult but it would have been nice to have an extra set of hands to keep it tight.
When attaching the new webbing I made sure to pull it as tight as possible before stapling it.
I added more pieces to the back to make it more durable than what was there previously.
Then it was time to figure out what to do next.
Next step to reviving the chair
After painting and redoing the jute webbing, the chair literally sat for weeks before I tried tackling the next phase of reviving this thrifted chair.
Which is adding the fabric.
The next step to reviving this chair was all about the fabric ,which caused me a bit of anxiety.
The problem was I had no budget to purchase fabric and wanted to only use what I already had on hand.
I had plenty of fabric curtains, drop cloth and scraps that could be used for the project, but I was not ready to commit to any one of them.
So it sat until I came up with an idea.
What was that idea you ask?
You will have to come back next week for the next phase of reviving this thrifted chair on a budget.
Be sure to come back next week to see phase 2.
This post may contain affiliate links at no extra cost to you. You may read the full disclosure statement on the disclosure page.
Till next time
Xoxo
Sonya


