Simple Dollar store DIY
It is hard to believe that it is almost fall so I am gearing up for some small changes in our home and wanted to share a simple, quick dollar store diy .
When the seasons change I like to make some changes to my home decor by moving things around or adding a seasonal craft. Most people may think that you have to go to a craft store for supplies, but I like to visit the dollar store to see what kind of crafting goodies I can find. On one particular visit I found these thin metal signs in a package of three for you guessed it, one dollar. I knew that I could take that and turn it into something meaningful for my home.
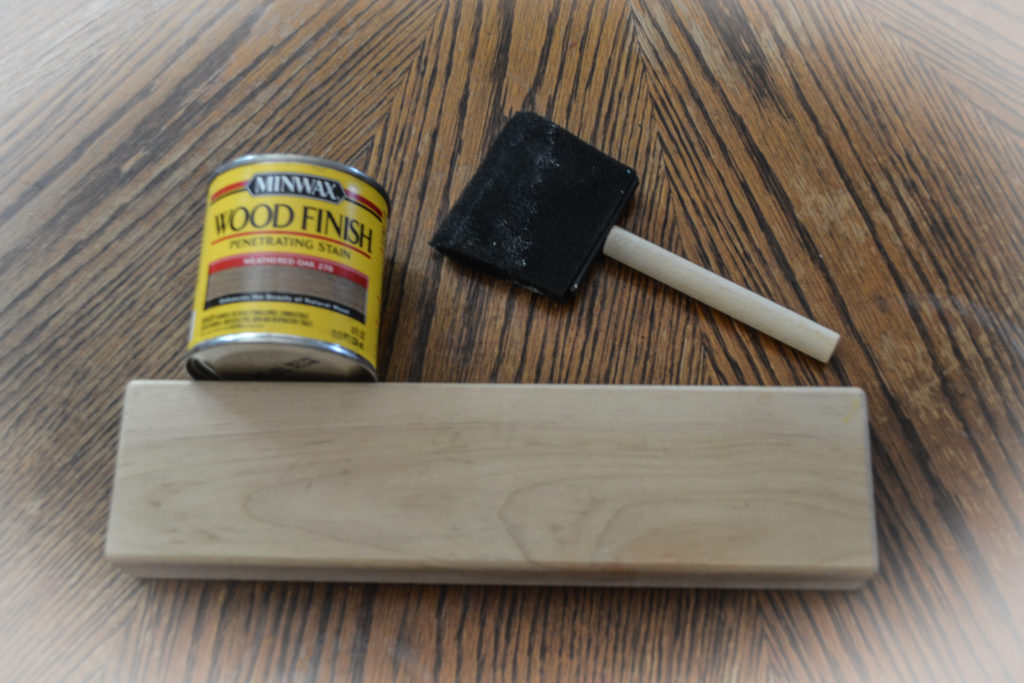
The other piece to this simple dollar store diy is that wood block you see in the not so great photo. That block was in a box of blocks my husband got from an old school his company was tearing down so he brought home a box for me to have in my classroom at the preschool. But of course I decided I needed just one for my quick little project.
Supplies I used for this project were:
One package of metal fall word art from Dollar Tree
One free wooden block (maybe you have some lying around or may find at the thrift store)
One bottle of Gorilla Glue
One small can of Miniwax stain (I used Weathered Oak)
A Makers’ Studio Chalkart paint (Peace & Joy)
The first step was to stain the wood block with the Miniwax Wood Finish and let it sit to dry. While mine was drying I painted the metal word with the A Makers’ Studio ChartArt paint.
The purpose of painting the metal words was to take the shine down. I just happen to prefer it that way but if you did this dollar store diy, you could do whatever you prefer with the words. After the paint and the stain dried, about thirty minutes later, I used the gorilla glue painted on with a small art brush so there was no excess on the wood block. I painted the glue on like paint directly onto the back of the word Harvest.
Next position the word onto the wood block being sure to have something to weigh down the word so that it adheres with the glue. A word of caution, make sure that whatever you use to apply pressure does not adhere to the words. This happened to me and due to the fact that the metal words are very thin, they bend very easily, so I had to peel mine off of the table it adhered to, reshape and reglue it.
This quick little dollar store diy word craft took a total of about one hour with drying time and only cost one dollar because I already had all the other supplies. I encourage you to not discount the Dollar Tree for craft supplies if there is one in your area, you just never know what you will find or what can be created of something so inexpensive and simple.
Let me know if your crafting using any dollar store products and please share, I would love to see your creations.
Till next time
xoxo
Sonya


Super cute, and affordable! Love these!
Thanks you Julie, I love that this was super afforadable.
Sweet! I like small signs that can be stored easily as the next season comes around!
Me too Michelle and this one can also be used in my classroom if I wanted to use it there.
I love how doable but impactful this kind of project is! The little sign is perfect to include in a fall vignette.
Pinning and sharing. 🙂
Thank you Stacey, me too. This is a simple project that anyone can do. I appreciate the love in pinning and sharing.
I love this project! Now I’m going to be on the lookout for those metal words…
I hope you are able to find some in Canada Rita
That’s just super cute!! Pinning right now!
Thank you so much for visiting and the pin.